Step-by-Step Finger Taping for Climbing Blisters
Climbing can be an exciting and challenging activity, but it can also be tough on your hands. Climbing blisters are a common occurrence among climbers, especially those who are new to the sport or pushing themselves to their limits. Blisters can be painful and make it difficult to continue climbing, but with the right techniques, they can be prevented and treated. In this blog post, we will provide a step-by-step guide to taping your fingers for climbing blisters. We will also share additional tips and tricks to help you prevent blisters from forming and keep your hands healthy and pain-free.
Materials Needed
Before we begin, here are the materials you will need to tape your fingers for climbing blisters:
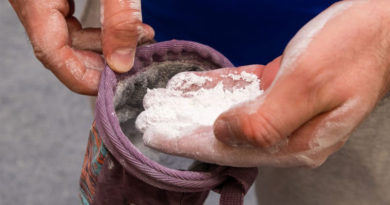
- Climbing tape: This is a special type of tape that is designed to be durable and resistant to sweat and moisture. You can find it at most sporting goods stores or online.
- Scissors: You will need a pair of scissors to cut the tape to the right size.
- Clean towel or cloth: Before taping your fingers, make sure your hands are clean and dry. You can use a clean towel or cloth to dry your hands.
That’s it! With these materials, you’ll be able to properly tape your fingers and protect them from blisters while climbing.
Prepare the Fingers
Before taping your fingers, it’s important to prepare your hands properly. Follow these steps:
- Clean your hands: Use soap and water to thoroughly clean your hands. Make sure to scrub under your nails and in between your fingers.
- Dry your hands: Use a clean towel or cloth to dry your hands. Make sure your hands are completely dry before applying the tape.
- Assess the affected area: Take a look at your fingers and identify the areas where you are most likely to get blisters. These are typically the areas where your skin rubs against the climbing holds or the rope.
- Choose the right tape: Select a roll of climbing tape that is appropriate for the size of the blister or the area you want to protect. Make sure the tape is long enough to wrap around your finger once.
By properly preparing your hands and selecting the right tape, you’ll be able to effectively protect your fingers from blisters while climbing.
Step-by-Step Finger Taping Technique
Now that you’ve gathered your materials and prepared your fingers, it’s time to start taping! Follow these step-by-step instructions for finger taping to prevent and treat climbing blisters.
Step 1: Anchor the Tape
Start by anchoring the tape to your wrist or palm. Wrap the tape once or twice around your wrist or palm with the sticky side facing up. This will create a base for the tape and prevent it from sliding off.
Step 2: Begin Taping
Take a piece of tape and wrap it around the base of the affected finger(s), just above the knuckle. Wrap the tape around the finger(s) in a spiral motion, moving upwards towards the fingertip. Make sure the tape is snug but not too tight, as this can cut off circulation.
Step 3: Cover the Blisters
When you reach the top of the finger, cover the blister(s) with a piece of tape. Cut a piece of tape that’s large enough to cover the blister(s) completely, with a little bit of overlap onto the surrounding skin. Smooth the tape down, making sure there are no wrinkles or bubbles.
Step 4: Secure the Tape
Wrap another piece of tape around the finger(s) in a spiral motion, covering the blister(s) and the previous layer of tape. This layer will help secure the tape in place and provide additional support.
Step 5: Repeat if Necessary
If you have multiple blisters on the same finger or on multiple fingers, repeat steps 2-4 for each affected area. You can also tape adjacent fingers together to provide additional support.
Step 6: Finish Taping
Once you’ve taped all affected areas, wrap a final layer of tape around your wrist or palm to secure the tape and prevent it from sliding off.
Tips for Proper Application
- Use scissors to cut the tape to the desired length, as tearing it by hand can create uneven edges and cause the tape to come off more easily.
- Smooth the tape down as you wrap it around your finger(s) to prevent wrinkles and bubbles that can cause discomfort.
- Avoid wrapping the tape too tightly, as this can cut off circulation and cause additional discomfort.
- If the tape starts to come off or feels uncomfortable, remove it and start again with a fresh piece of tape.
Conclusion
In conclusion, climbing blisters can be a painful and frustrating experience for climbers. However, finger taping can provide a simple and effective solution to prevent and treat blisters. By following the step-by-step guide outlined in this post, you can learn how to properly tape your fingers and avoid discomfort and injury while climbing.
Remember to always clean and dry your hands before taping, choose the right tape for your needs, and follow proper application techniques. Additionally, taking steps to prevent blisters from forming in the first place, such as wearing properly fitting shoes and gloves, can help keep your hands healthy and happy.
If you experience any severe or persistent pain or discomfort, seek medical attention from a healthcare professional. With the right knowledge and tools, climbers can protect their hands and continue to enjoy the sport they love.
Happy climbing!